Check Operation
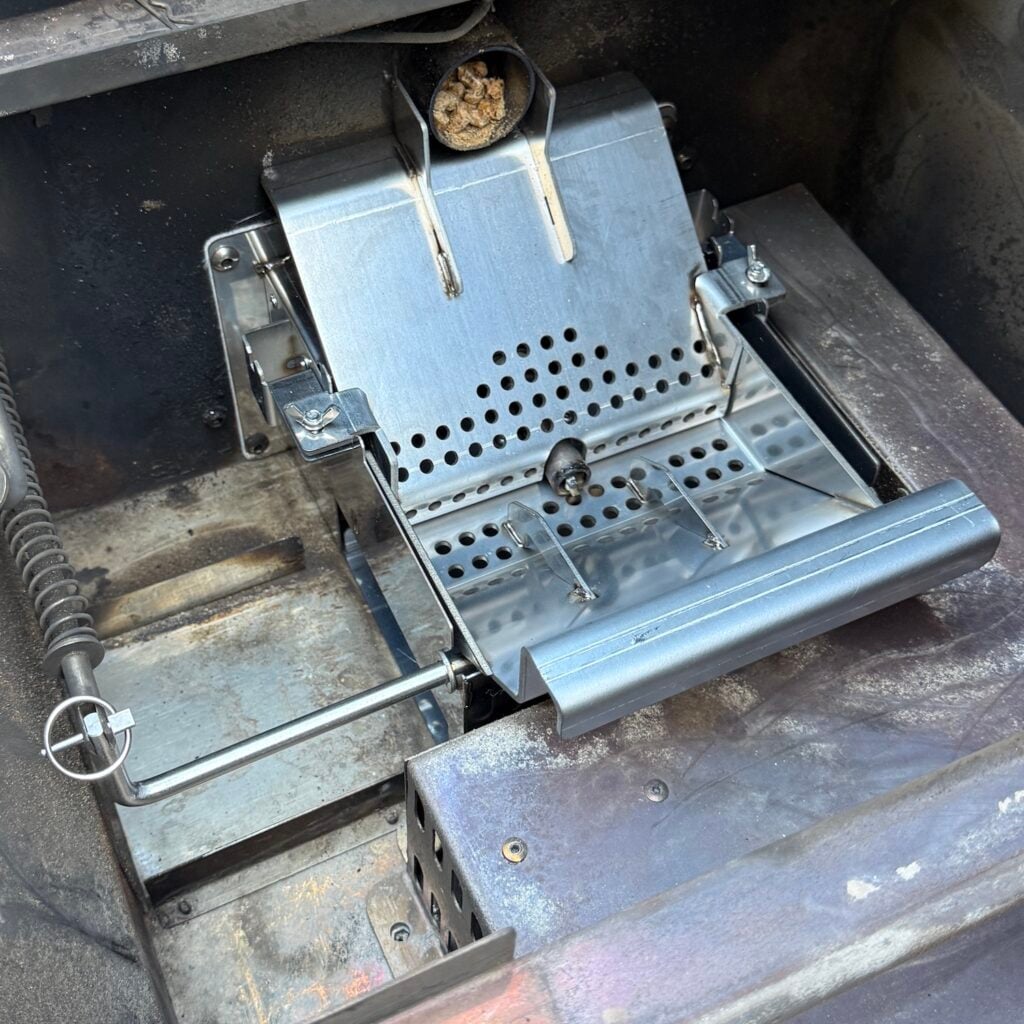
- Remove the heat baffle so you can see the ignition rod clearly in the bottom of the fire grates.
- In the controller, go to MENU > SETTINGS > TEST OPERATION > Pellet Ignitor and run the test.
- If the ignitor is not using power it will FAIL the test. It will also be obvious through a visual inspection as it should start to get red hot in a matter of seconds.
- See instructions below to turn the ignitor off and the manually fire up the grill until a replacement ignitor is obtained.
Turn Off Ignitor
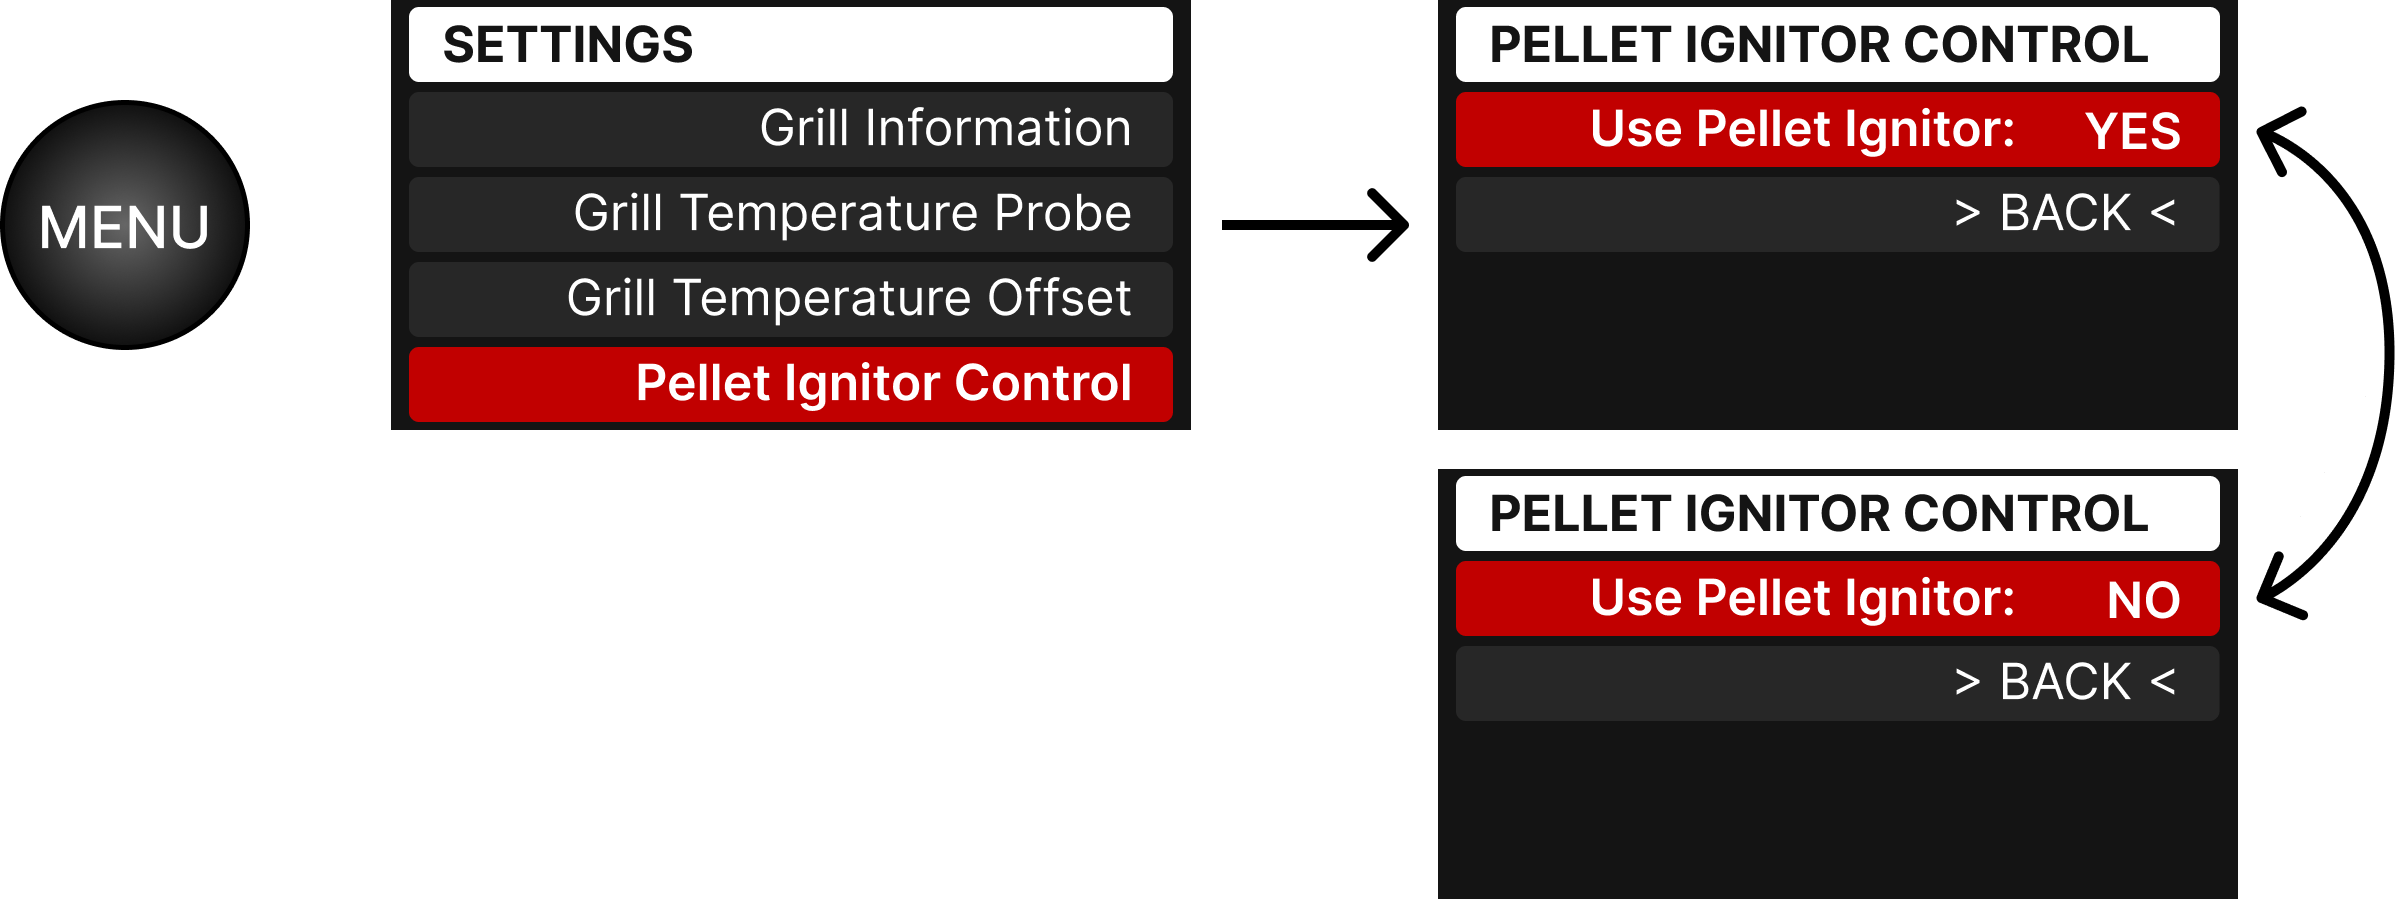
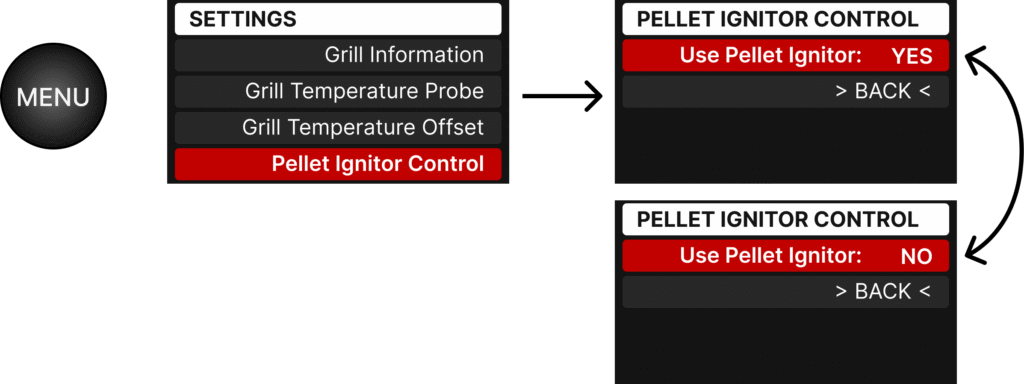
- In the MENU, navigate to Settings > Pellet Ignitor Control, and set Use Pellet Ignitor to NO.
- Once the replacement ignitor is installed, turn back to YES.
Manually Light Fire
If the ignitor fails, you can still use the grill until a replacement arrives by turning the ignitor off in the controller settings and manually lighting the fire.
Manually Light Fire (butane torch method)
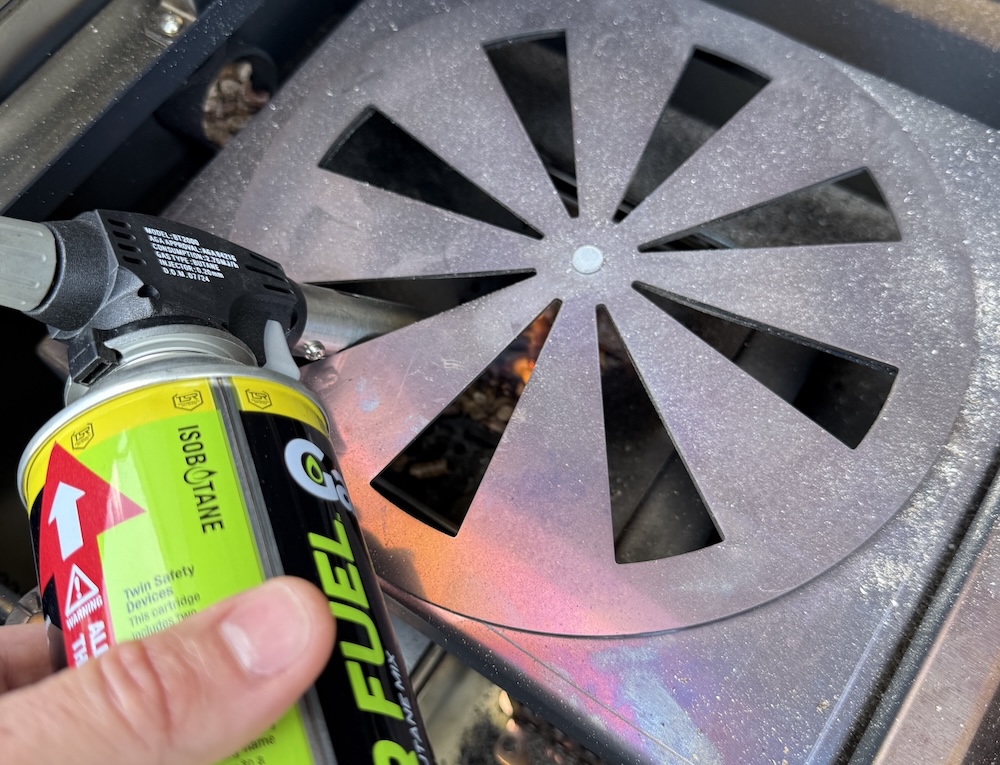
- Fire up the grill as normal, but use a butane torch to light the pellets as they pile up.
- This can be done direclty through the gaps in the heat baffle flame vent.
- Once the fire is lit, put the drip trays back in place and run as normal.
Manually Light Fire (fire lighter method)
- In the MENU, navigate to Feed Wood Pellets, then Empty Hopper.
- Run for around 15-20 seconds, until a small pile of pellets has accumulated. Press the control knob to stop feeding.
- Drop in a fire-lighter, or fire lighting gel (not liquid) – and light.
- Once the fire is lit, Fire Up the grill as normal.
- The grill will dump more pellets during the startup process so a decent amount of smoke may be released.
Avoid LOW Temperature Settings
- The pellet ignitor is not only used to fire up the grill, it also comes on periodically if the fire goes out when operating with a very small fire at low temperatures.
- Operate the grill at a minimum of 105℃ / 225℉ and LOW smoke (larger fire) setting.
Tool & Parts Required
- 4mm Hex tool (Allen key)
- Scissors or wire snips
- Philips head screwdriver
- Replacement pellet ignitor (from Trimal team)
Full Replacement Process
If the hopper is already attached to the grill, follow the steps below.
Remove Hopper Fan Cover
Remove the hopper fan cover by unscrewing the 4 large screws on the side panel.
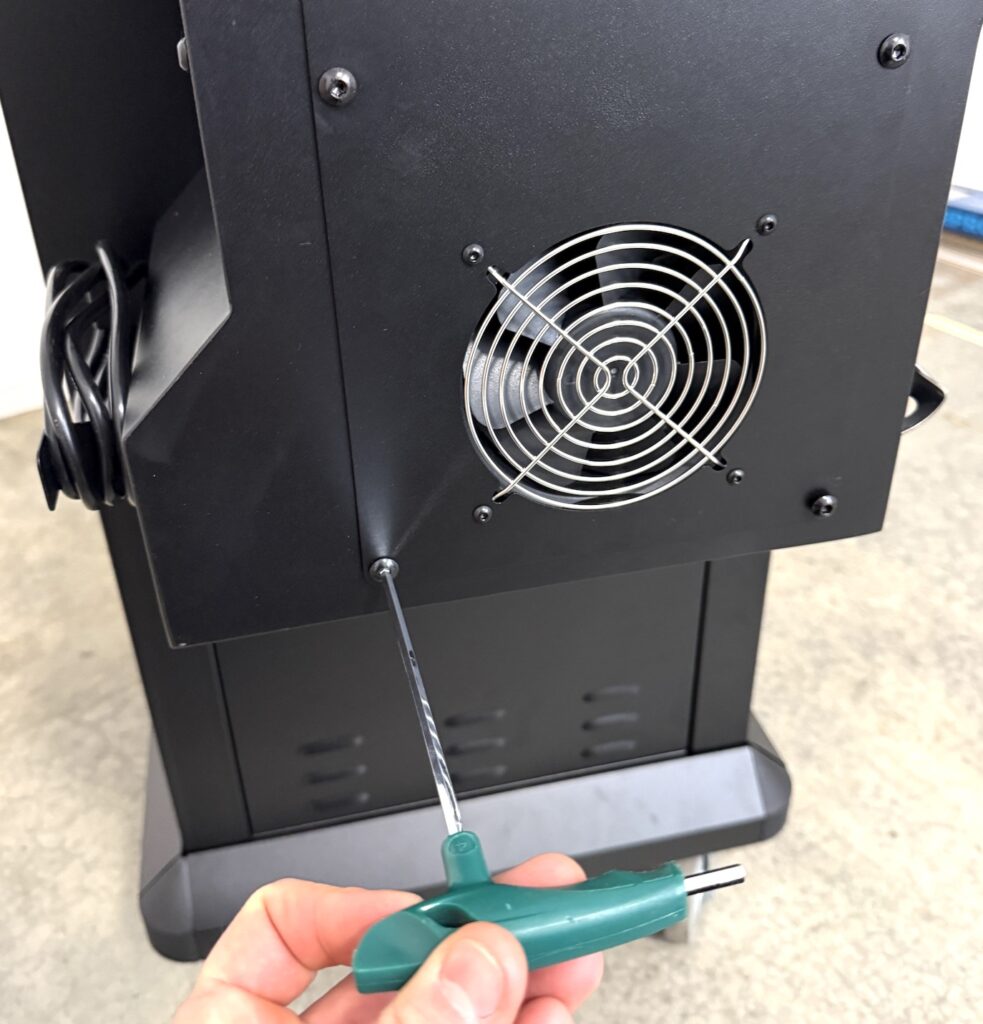
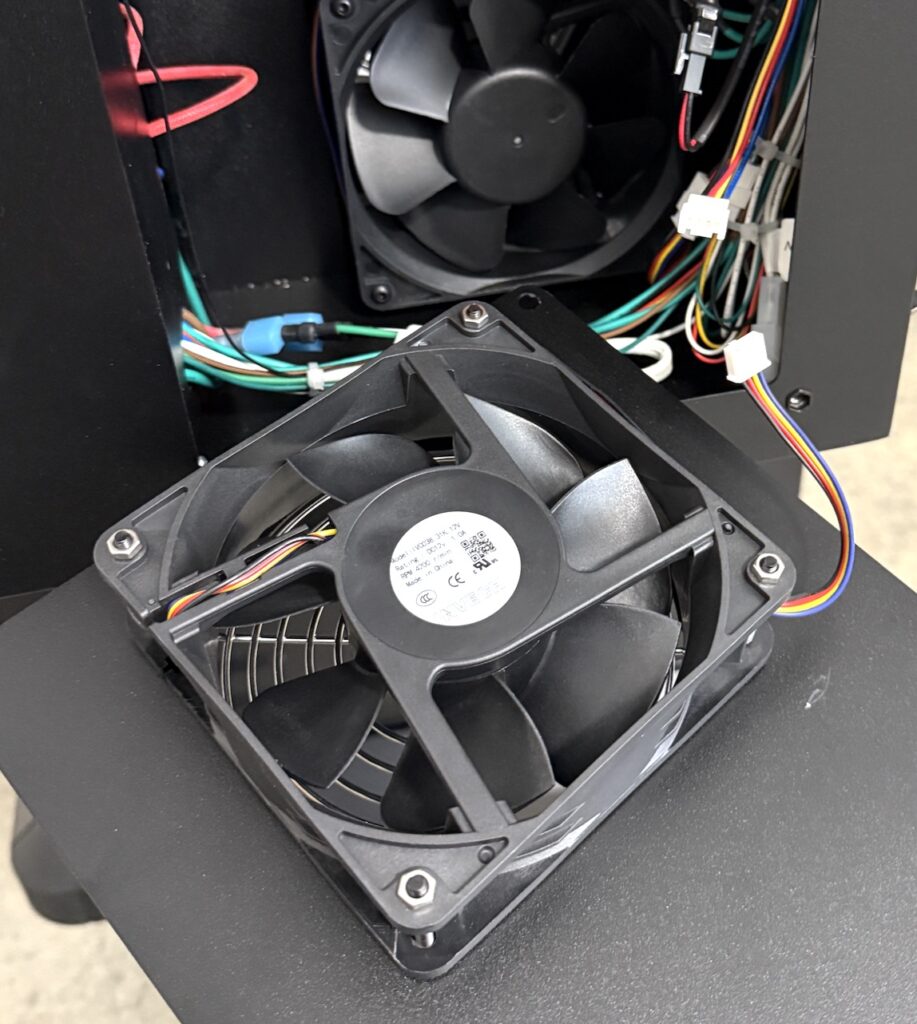
Unplug the outer fan connector, and place fan off to the side.
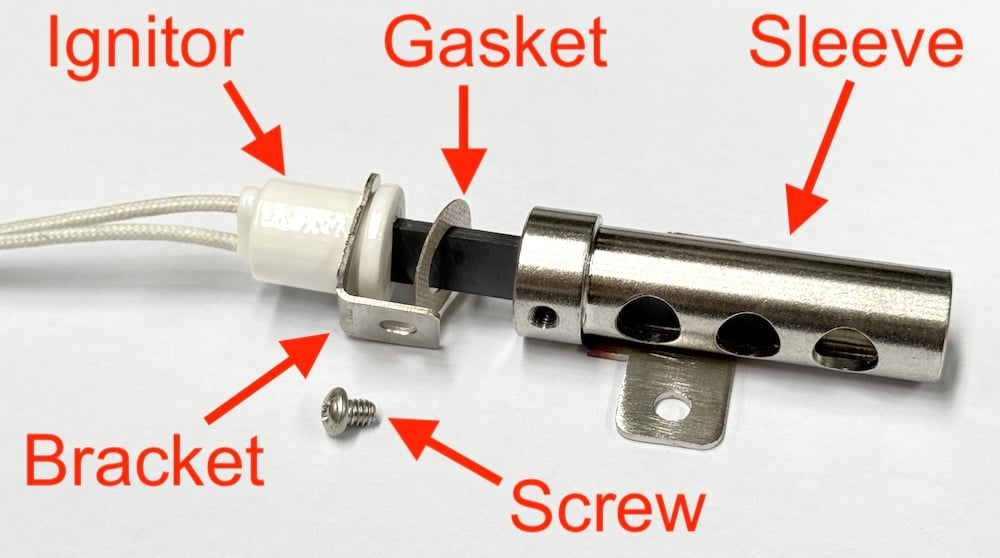
Remove Ignitor from Sleeve
Unscrew the 2 screws holding the ignitor sleeve in place.
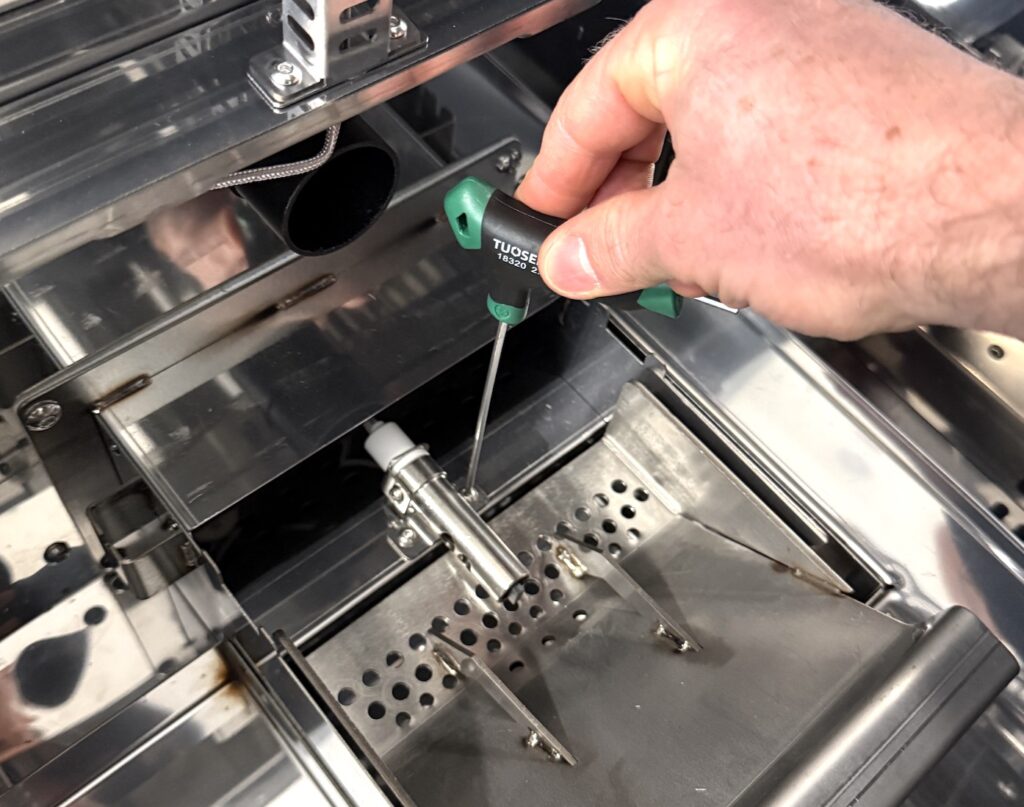
Unscrew the small screw on the side of the metal sleeve to release the ignitor.
Unplug Ignitor
Find and then unplug the ignitor plug which has purple-white wires.
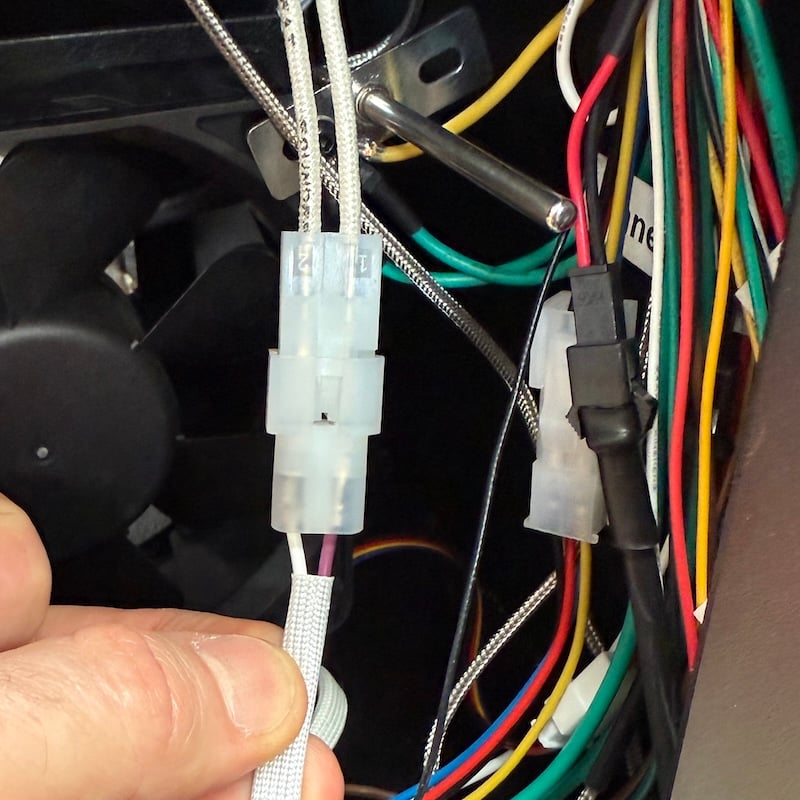
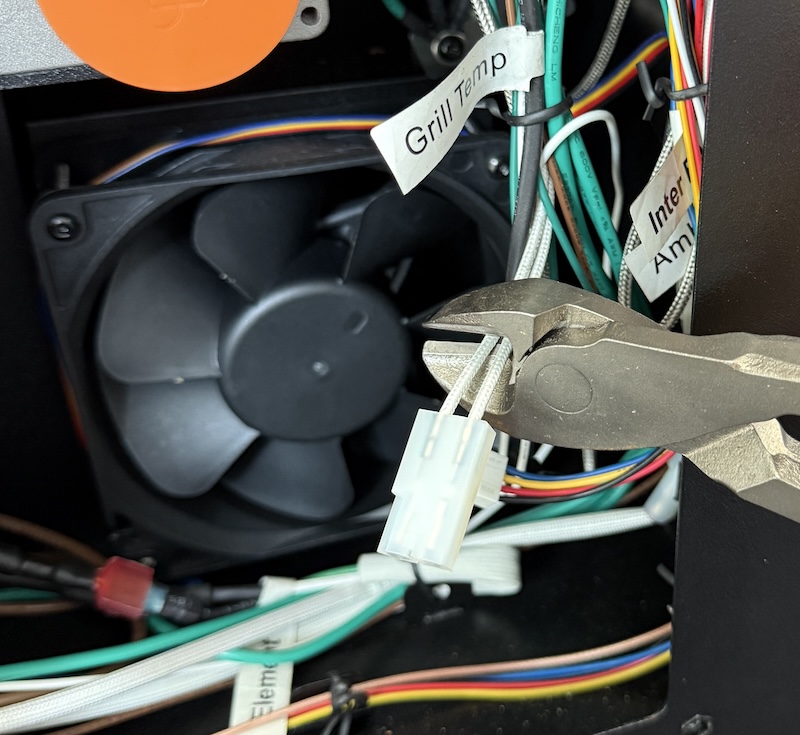
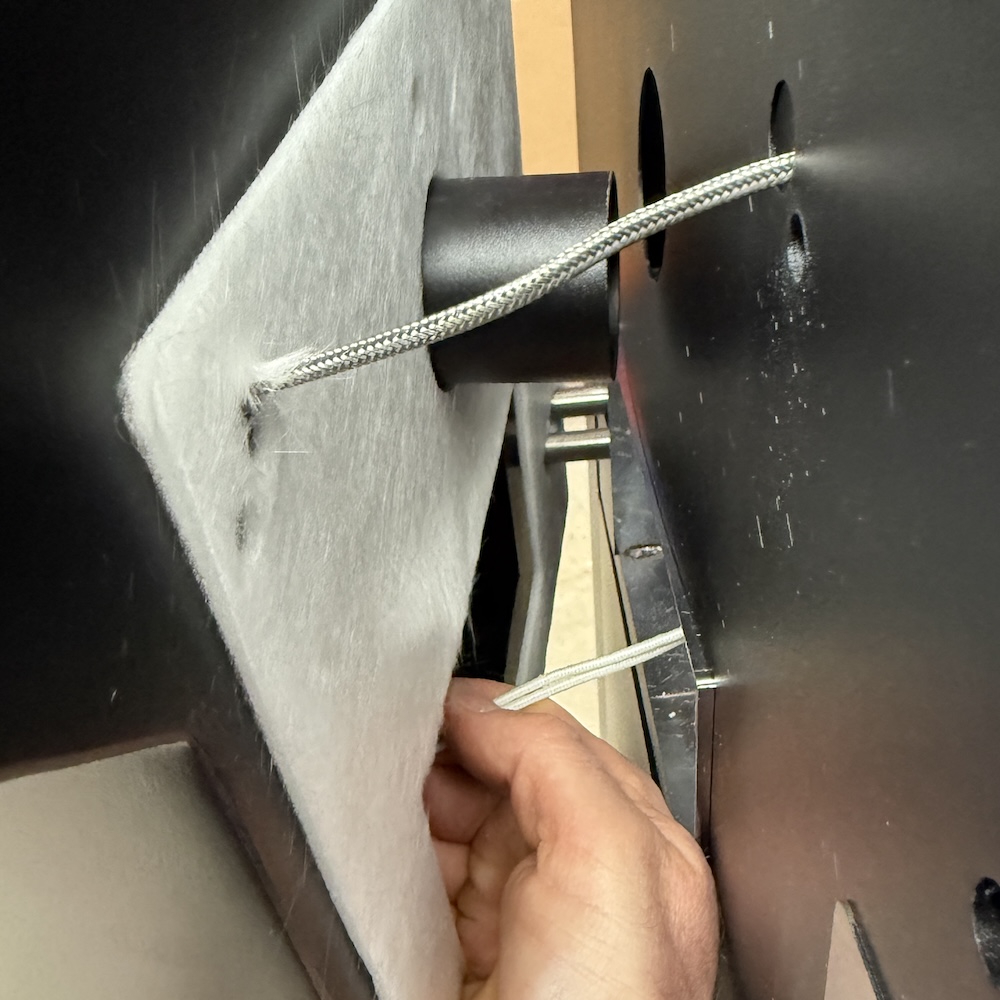
The cable runs back through a hole in the side of the fan box. It is secured in place with twist or cable ties. Instead of cutting the ties, simply cut the ends off the pellet ignitor cable (plug end and ignitor ends) and pull the remaining cable out.
Replace Ignitor
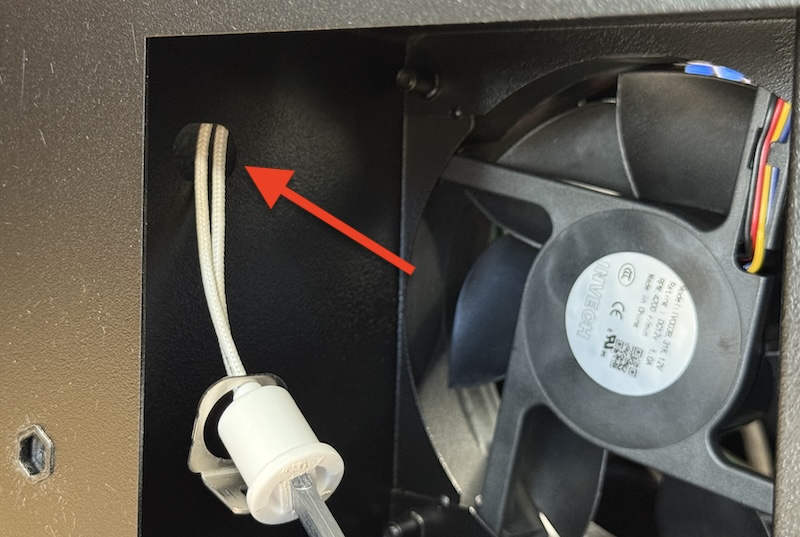
The hole that the ignition rod plug pass through is in the side of the fan box. It can be reached directly in through the fire-box for small-medium sized hands.
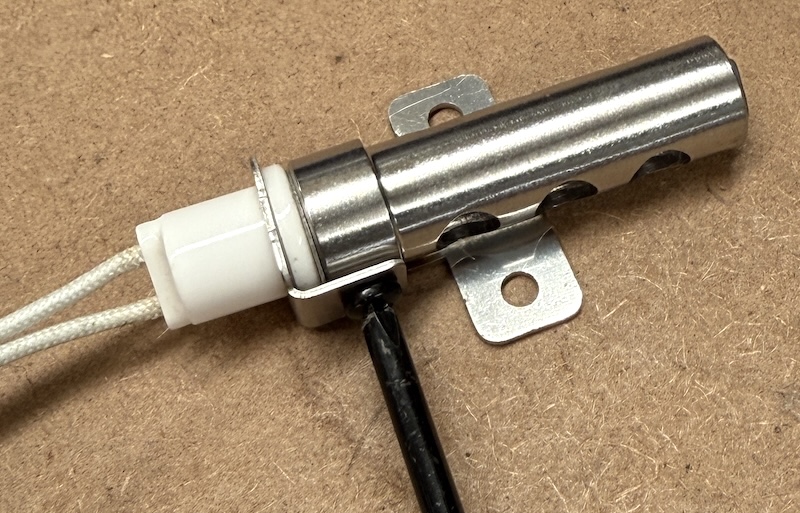
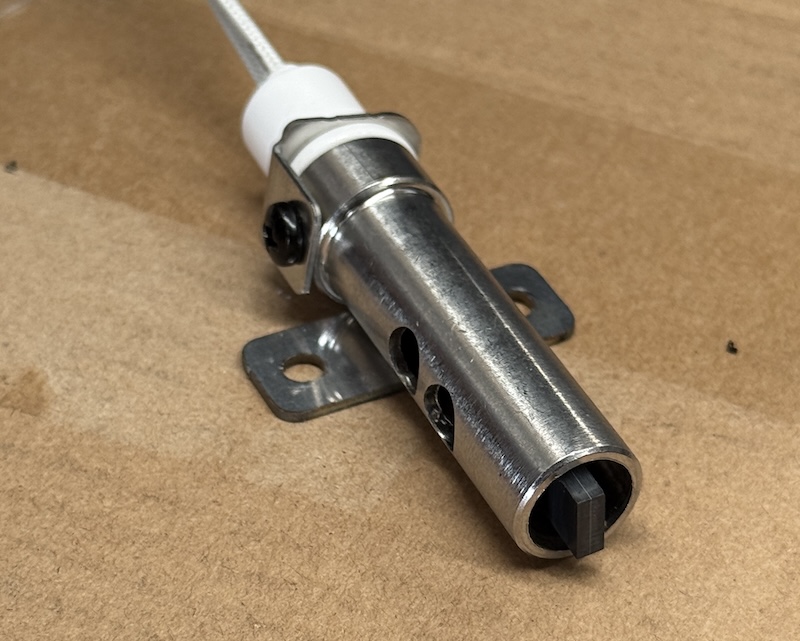
Make sure the metal bracket has been slid onto the cable first, as shown in the image below.
If your hand is too big to fit in through the fire box to feed the plug through the hole, the hopper can be slid out (or totally removed) for easier access.
Remove the four bolts that secure the hopper and slide it out enough to directly access the hole more easily.
Support the hopper at its full normal height on a chair or have a friend lend a hand. By supporting it like this the heating element and grill temperature sensor do not need to be disconnected.
Pull up enough slack on the grill temperature sensor cable to allow the hopper to slide away enough for easy access.
Slid the hopper back into place taking care not to squash or kink the pellet ignitor cable or grill temperature sensor cables.
Secure the ignitor back into the stainless steel sleeve (vertical orientation). Make sure the fibre gasket/washer is fitted at the base of the ignition rod.
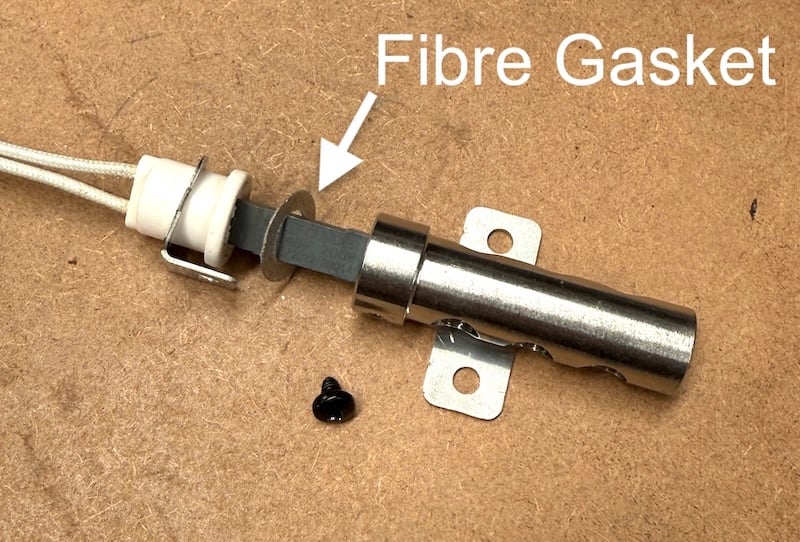
Don’t worry if the ignitor gently touches the inner walls of the metal sleeve, or isn’t perfectly vertical.
Secure the sleeve back in place ensure it is straight. Position the left fire grate in place to check if the sleeve is positioned centrally.
Plug In and Clean Up
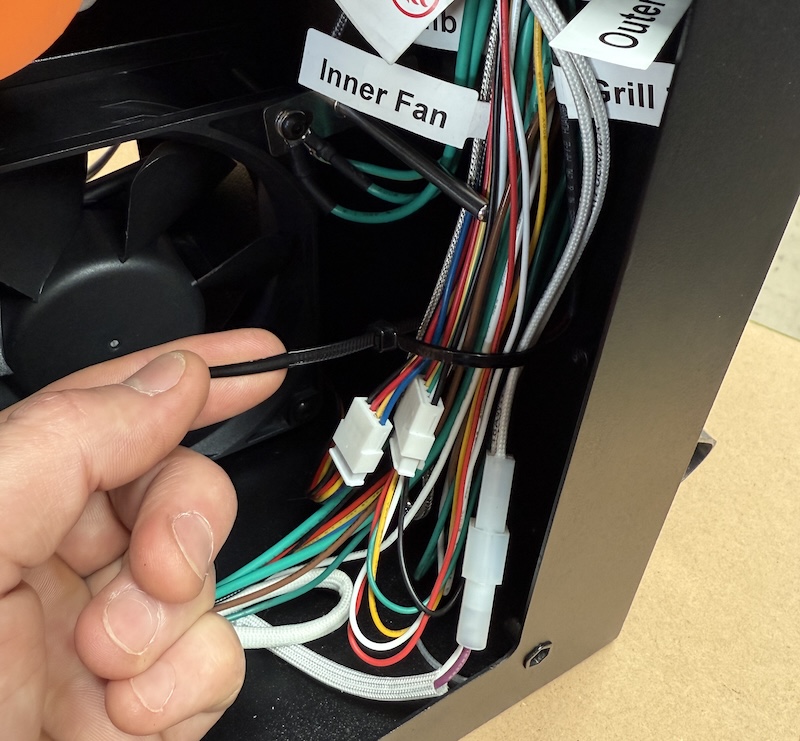
Reconnect the ignition rod plug.
Cable ties the wires to the right out of the way of the fan.
Replace the cover (don’t forget to connect the fan plug first!)
Turn ON Pellet Ignitor
If the pellet ignitor was turned off to allow a manual fire up, it needs to be turned back on in the menu.
- In the MENU, navigate to Settings > Pellet Ignitor Control, and set Use Pellet Ignitor to YES.
Test Ignitor Operation
Check to make sure the ignitor is working correctly but running a quick test.
Only run the test with the pellet ignitor installed properly!
The ignitor will run for 15 seconds and will show “PASS” if using power. Also look to see if the ignitor is starting to get red hot.
