The Trimal S1 comes standard with a built in rotisserie motor mounted in the hopper. Rotation can be started and stopped by touching the FN (function) button on the control panel and even via the Trimal Aus App.
Parts Overview
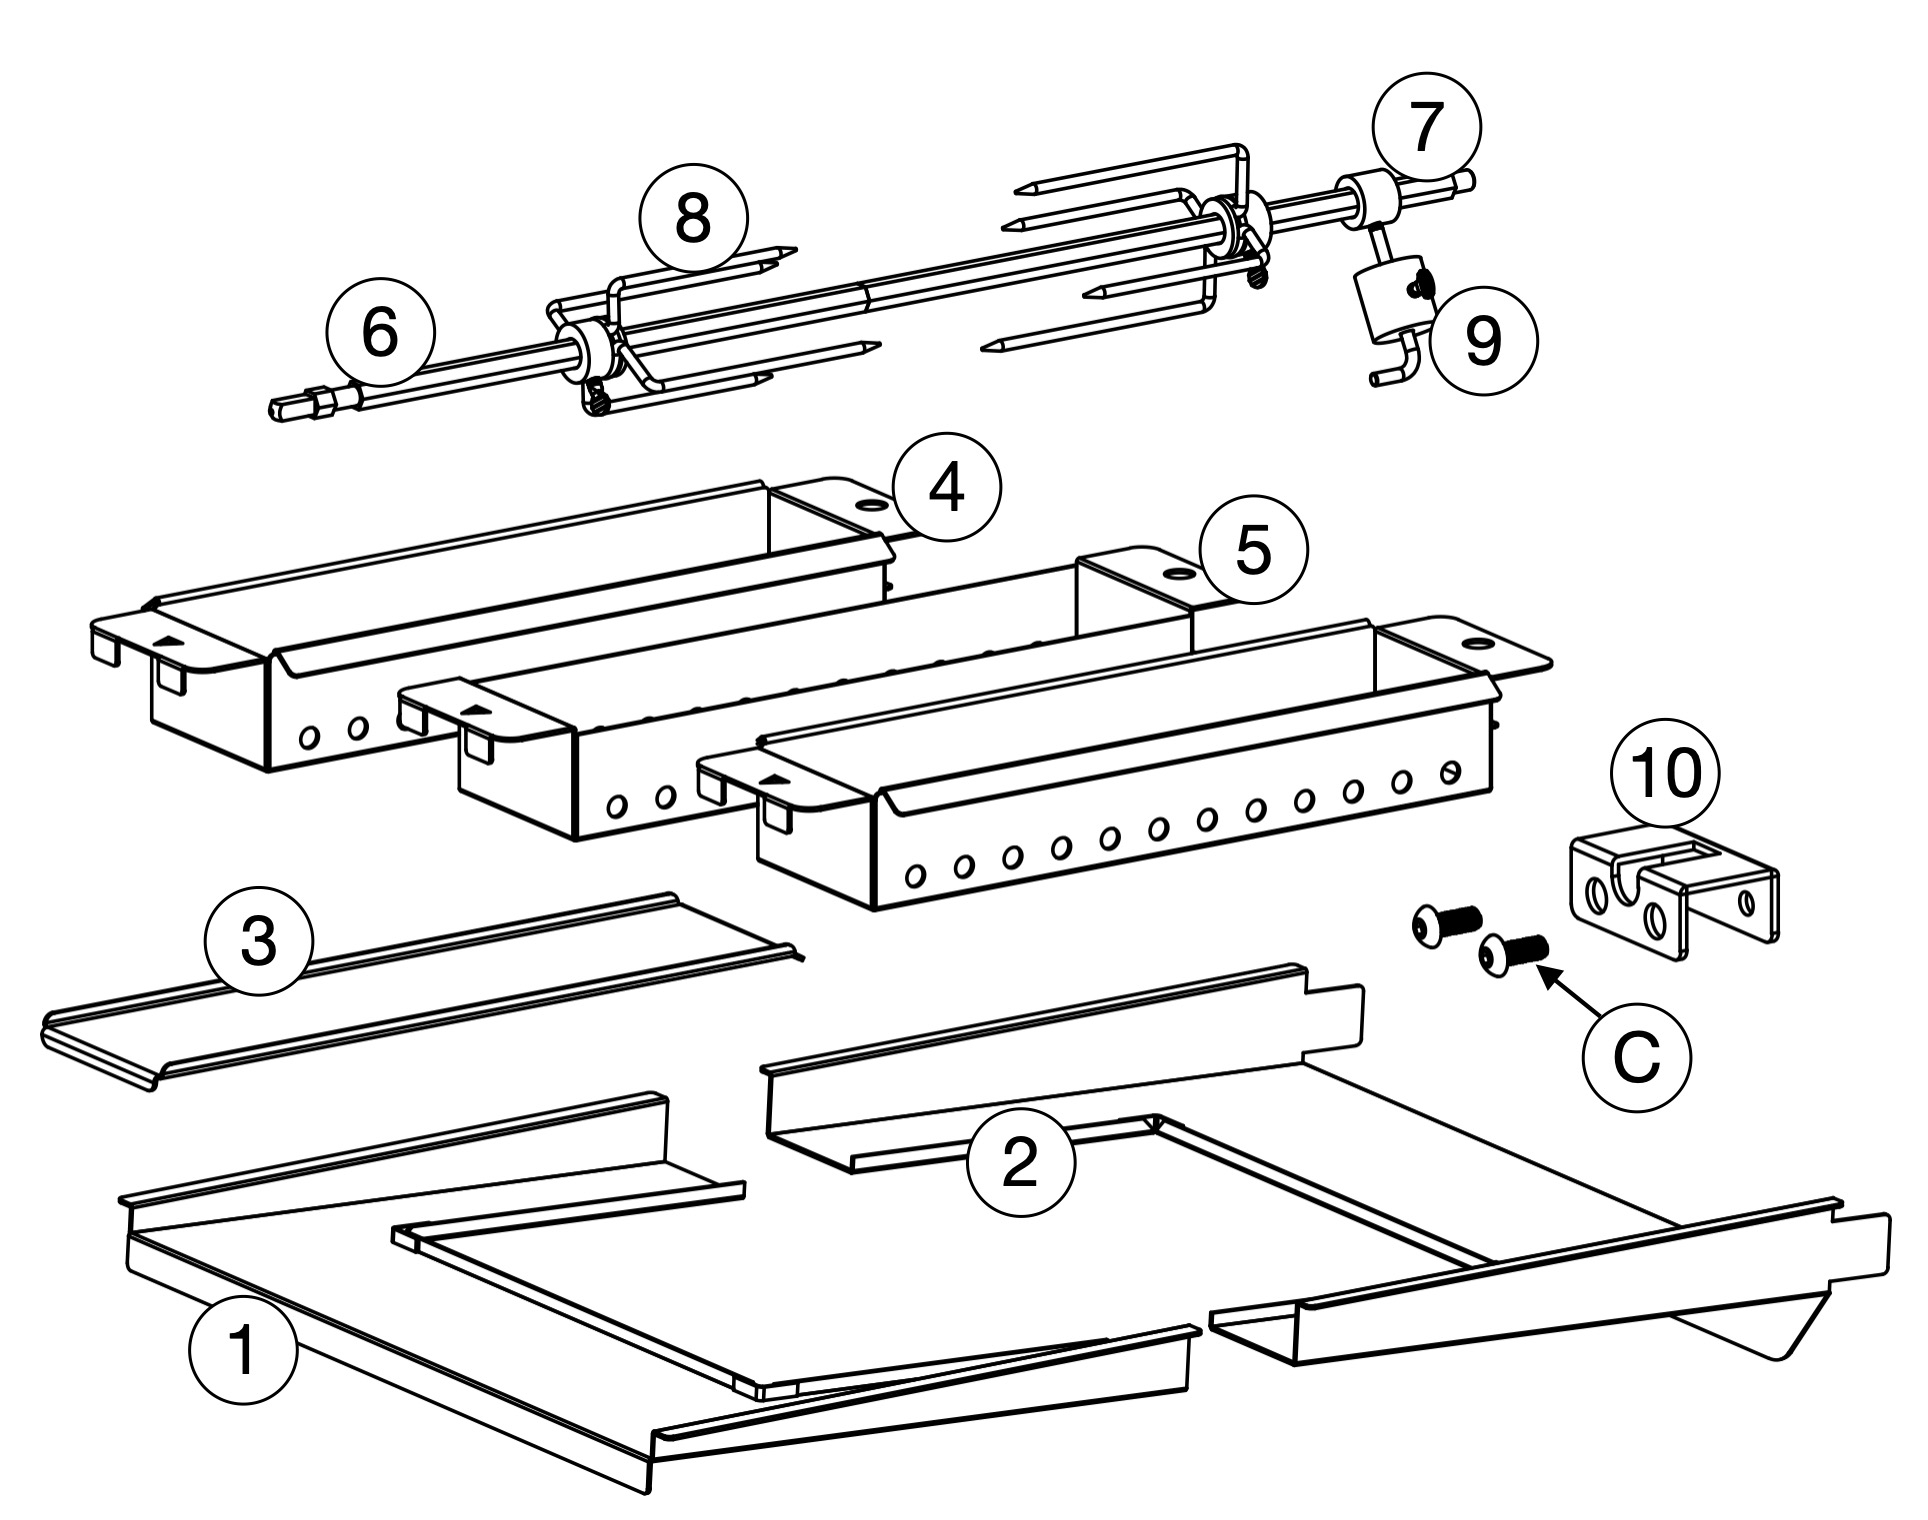
The Rotisserie and Charcoal Tray Kit includes all the parts to take full advantage of the built in rotisserie motor.
Below is an outline of all the parts included.
- Left-Half Support Tray (x1)
- Right-Half Support Tray (x1)
- Centre Drip Tray (x1)
- Side Charcoal Baskets (x2)
- Centre Charcoal Basket (x1)
- Left Shaft (x1)
- Right Shaft (x1)
- Spike Assembly (x2)
- Balance Weight (x1)
- Shaft Support Bracket
- M5x12 HEX Screws (x2)
Rotisserie Shaft & Spikes
Shaft Assembly
- Screw the shafts together and use two spanners to do up tightly.
- Failure to do up tightly can result in the thread loosening when the shaft rotates counter-clockwise.
Securing Food
- Weight limit of 5kg of well balanced food.
- Push the food onto the shaft, ensuring it is as evenly positioned/balanced as possible.
- If not balanced the food won’t rotate smoothly and can exceed the torque limit of the motor.
- Slide the spikes on left and right to hold the food securely. Do up the thumb screws to hold in place.
- Use food twine (string) to secure the food so parts don’t flop around as it rotates.
Shaft Rotation & Balance
- The motor will rotate the shaft at around 2 RPM and can rotate in both directions, automatically reversing if the resistance exceeds the maximum torque of the motor.
- If the shaft is continually reversing direction back and forth, check the balance of the meat on the shaft.
- Ensure it is as evenly weighted as possible.
- Use the balance weight to help counteract imbalance due to the shape of the meat.
- Space the meat out more evenly along the length of the shaft.
- Ensure the weight is centred in the shaft, not far left or far right.
- If the right end of the shaft is wobbling up and down, the balance is off.
- Position the balance weight on the shaft opposite the heaviest part of the food that is causing the imbalance.
- Sliding the weight further out on the arm increases the counterbalance effect.
- If the wobbling can’t be controlled with the balance weight, try positioning the meat better on the shaft.
Pellet Fired Rotisserie
Equipment Setup
- Leave both drip trays in place and cover with aluminium foil for easy cleanup.
- Bottom grill racks may be placed in as other foods can be cooked at the same time as the food on the rotisserie shaft.
- Remove the rotisserie slot cover from the side of the grill. If the rubber seal has not yet been removed, cut out the section below the cover so there is clear opening for the shaft to pass through as outlined in the video below.
Grill Control
- Select the Wood Fired Rotisserie cooking mode from the PRO menu and fire up. Click here for more information about all the cooking modes and how to operate the grill.
- Wood pellets and the heating element (when using MED and HIGH smoke settings) will provide heat for the cook.
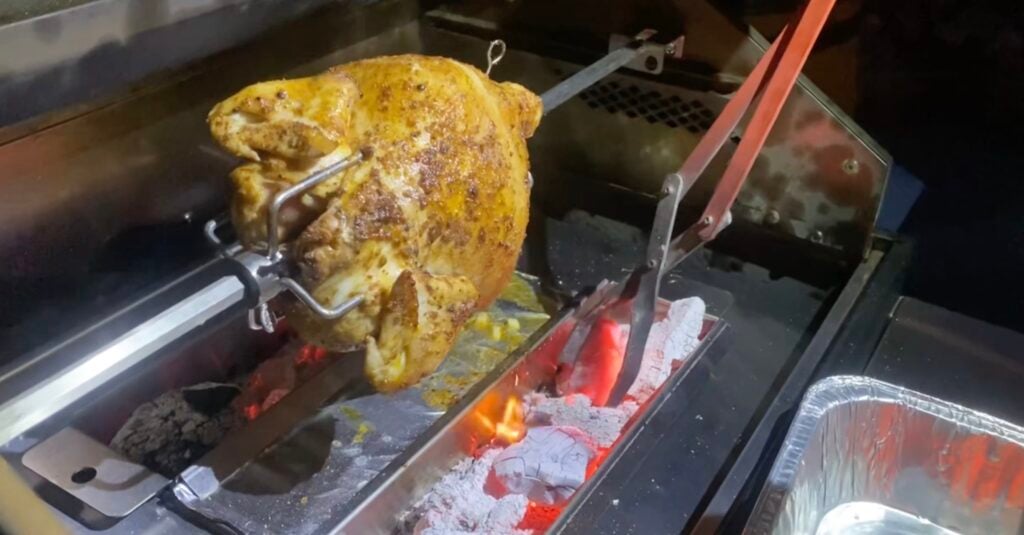
Charcoal Rotisserie
Equipment Setup
- Remove the left drip tray, left the right drip tray in place.
- Place in the the right-half support tray first, then the left-half support tray so it overlaps. The support trays hook along the front/rear edges of the grill, with a gentle sloping surface down towards the drain.
- The charcoal baskets can be configured front and back filled with charcoal and the centre space either with the drain plate, or the centre basket lined with foil and filled with water for more moisture.
- Placing charcoal in the centre basket when doing a rotisserie is not recommended as the food will come too close to the heat and may easily burn. Fat dripping on the charcoal can also cause lots of flare ups, burning the food.
- Depending on the size of the meat, one basket of charcoal may even be sufficient, or the amount of charcoal may need to be reduced (take some out) if cooking too fast or burning.
- The cook should be completed with the lid open. Cooking with the lid shut will not result in excessive temperatures, but a grease fire can occur – so monitoring the cook is important.
Grill Control
- Select the Charcoal Rotisserie cooking mode from the PRO menu.
- The fan speed can be set to push airflow through the bed of charcoal.
- Normally a speed of 25% is suitable, provide some gentle air flow.
Charcoal Grilling
The charcoal baskets can be used with grill racks placed over the top (no rotisserie shaft), to do open flame grilling.
Equipment Setup
- All three of the charcoal baskets can be placed into the grill and charcoal placed in each.
- Place the grill racks over the top.
- Wait 5-10 minutes for the grill racks to heat up, then cook directly over the charcoal.
- Be cautious of large flare ups if cooking very fatty food.
Grill Control
- Select the Charcoal Rotisserie cooking mode from the PRO menu.
- The fan speed can be set to push airflow through the bed of charcoal.
- Use a minimum of 20%, and maximum of 50%. The higher fan speeds will blow the heat out of the grill faster, actually reducing the air temperature in the grill (when the lid is closed).
- If additional smoke flavour is desired, throw a handful of wood pellets on top of the charcoal every few minutes, or even a wood chunk.
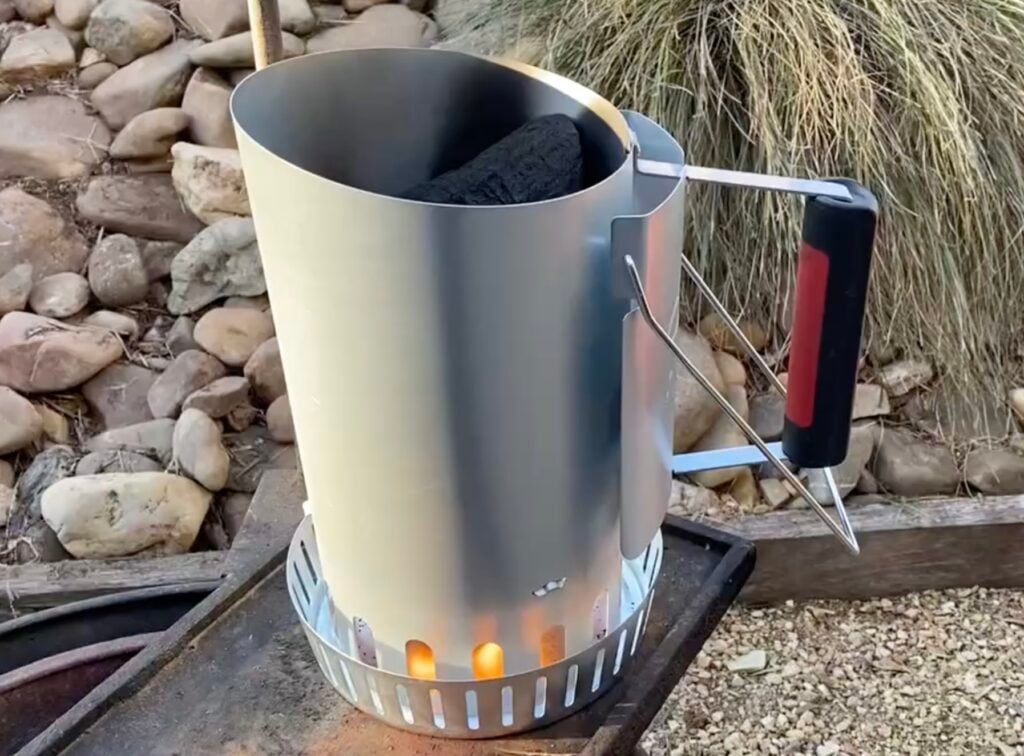
Preparing Charcoal
Charcoal (briquette or small lump) is required for both the Charcoal Rotisserie and Charcoal Grilling cooking methods.
The process of preparing the charcoal is the same as for any spit roast, kettle or other charcoal cooking devices, namely, the charcoal needs to be first lit in a chimney and then poured into the charcoal trays.
Follow the steps below.
- Place briquettes or small lump charcoal in a charcoal chimney.
- Place two or three fire lighting cubes on a heat resistant surface and light.
- Place the charcoal chimney over the top of the lit fire lighters.
- Wait 15-20 minutes until the charcoal is all burning and has turned a white ash colour with no large flames visible.
- Either pour the charcoal into the trays while they are already in the grill, or pour into the charcoal trays and then lift into the grill (wearing heat proof gloves).
Rotation Start & Stop
- Press the FN quick action button to start and stop the rotisserie shaft rotating.
Cleaning
- After cooking let the charcoal fully burn out and dispose of safely.
- The charcoal baskets will become discoloured and dirty with ash and do not need to be cleaned too thoroughly.
- Clean all other stainless steel parts (trays shaft, spikes and counter balance) with warm soapy water and non abrasive kitchen cleaner (jif, bar keepers friend etc) as required.
- All parts are dish washer safe.
Noisy Rotisserie Motor Shaft
If there is a squeaking or grinding noise coming from the rotisserie motor, the adapter that the shaft pushes into might be tight against the side of the hopper casing. This can be easily fixed. Check out the video below.
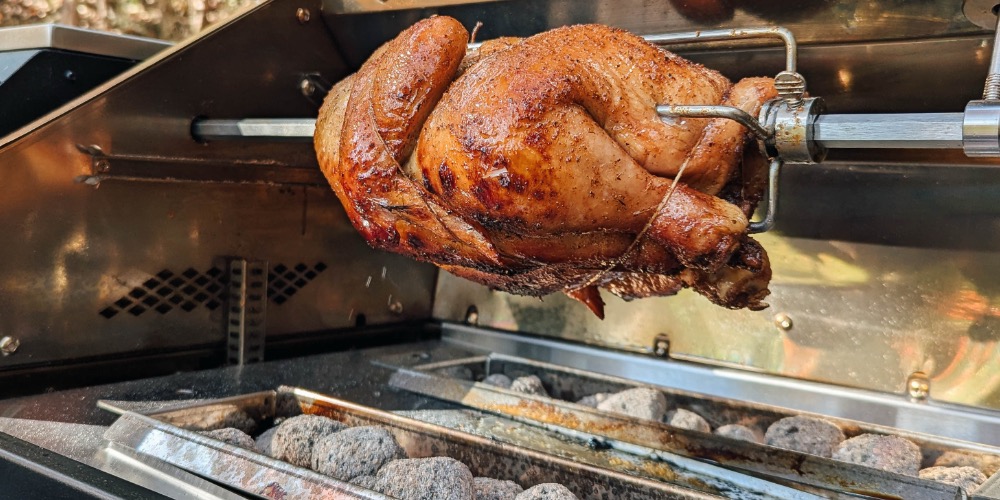
Example Cooks
Roast Chicken & Potatoes
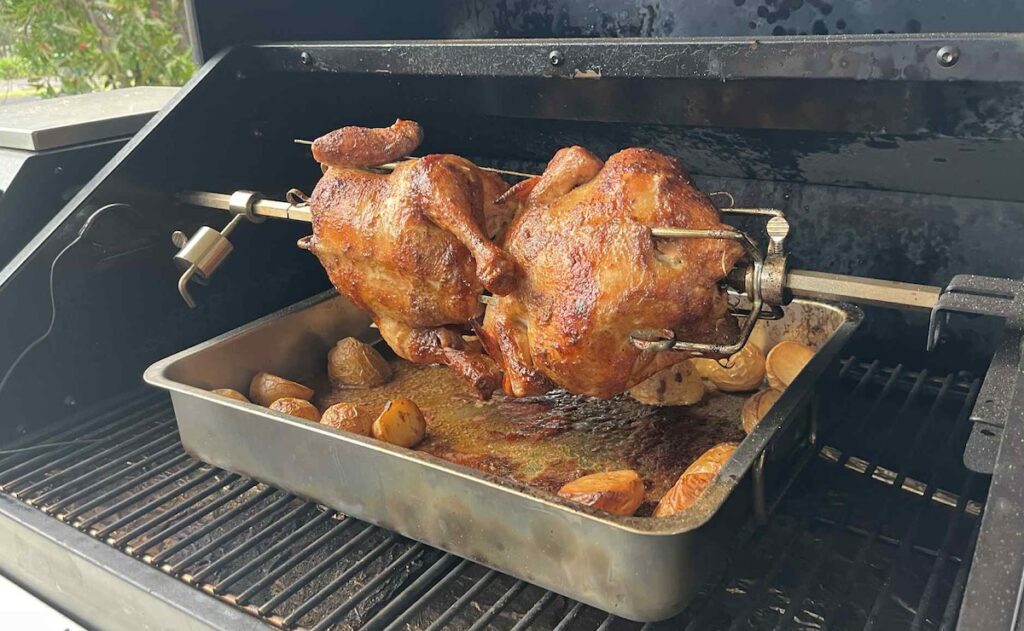
Chris (the_bbq_carnivore) does a rotisserie roast chicken that his family loves. It’s super easy and tasty. Here are his tips:
- 2 small chickens works better than 1 large chicken.
- Use stainless steel skewers to help connect the chickens together to they spin nicely
- Cook at 180℃ / 356℉ for around 2 hours, finishing off at 240℃/ 464℉ for extra crispy skin.
- A shallow stainless steel tray works well to catch the fat drippings and cook potatoes.